Forms

Communicating with clients often requires collecting their personal data for further cooperation. For this purpose, we created the advanced forms inside of Nectar Desk so call answering services could gather and process the information quickly and efficiently.
Let’s consider one of the dozen possible scenarios of form usage ??
Imagine you are running health care services and need to fill in customer information during the call. Making notes using a pen is so old-fashioned, isn’t it? The notes can be mixed up and the working process is at risk of being messed.
Here is where the forms‘ time has come.
How to set up a form?
The setup procedure is real quick.
Step 1
First of all, go to Forms in the left menu and choose Fields: 
Create various fields with different options for the answer. These answers will be arranged in a drop-down under the created form.
Here is the list of available field types:
- text input
- text area
- select – here you may add as many options as you require and choose the needed one during the call:

- checkbox to mark with ✔
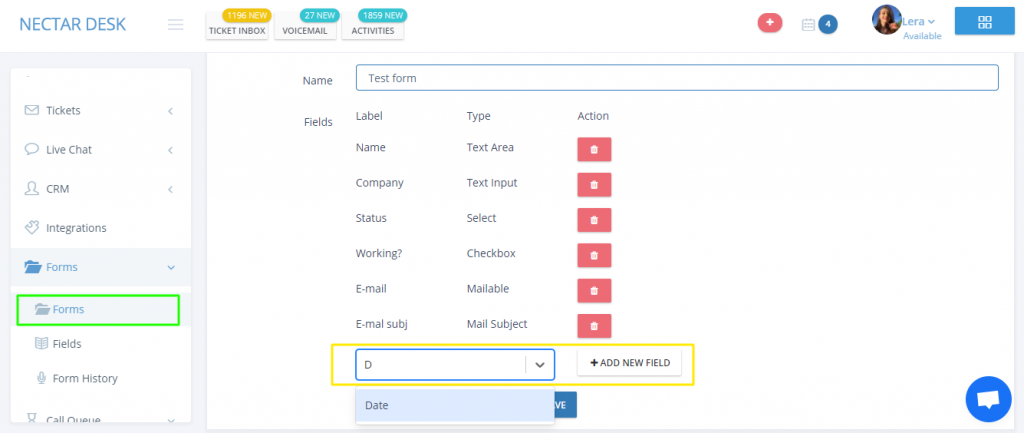
- date

* You may mark the field as required  so that it becomes mandatory to fill it in.
Hooray ? The first step is over, let’s move further?
Step 2
Now we need to go to Forms section and create the form itself, adding the previously created fields:

Good job??
Step 3
The forms should appear at the incoming call pop-up as well.
So we need:
- Activate forms under Screen Pop settings:

2. Assign forms to a required ring group(s) so that the form would be shown under the incoming call pop-up.

That’s it! Now you are ready to take calls and submit the form while talking to the client ☎ ☑
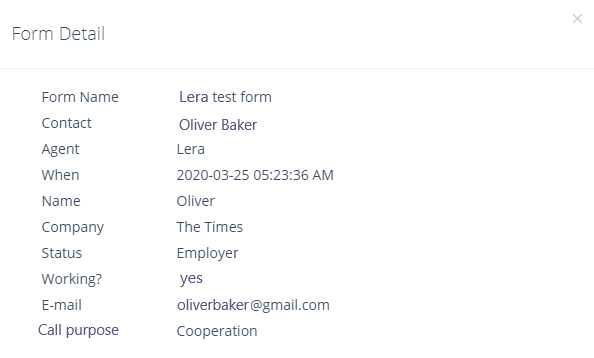
Here is how the completed form looks like:

Some more useful hints for Forms usage:
⚪ It is possible to submit multiple forms per call if there is more than one form created – no limitations of your comfort in Nectar Desk ?
⚪ When the supervisor/ admin wants to evaluate a call, he should be able to go to Call History, click on the Submit Evaluation Form button , and choose the needed form from the drop-down. Once the form is chosen, the agent fills it in and saves.
⚪ All submitted forms are stored under where you can filter or export them.
Last Update
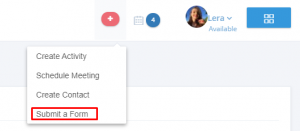
› We’ve added an option to create a form outside of the call – in case you need to fill in the clients’ information taken from the SMS or Ticket, for example.
Just click ![]() at the top of the page and submit a form:
at the top of the page and submit a form: 
› It’s now possible to enable Submit a Form option for outbound calls only. To make it so, please go to Screen Pop settings and enable Automatically open Screen Pop for Outbound calls option: 
Then go to Forms  and select Outbound Caller Id(s) for outbound calls: these are the numbers the Form submit option will be available for:
That’s it.
We hope the setup was easy as ABC ?
If you face any difficulties, we are always glad to assist! Find the live chat bubble at this page  and we will help you✌


