Integrate your Facebook Business account with Nectar Desk and handle your conversations directly from the Nectar account without opening the Facebook tab with the possibility to have calls, SMS, email, and other functionality. There is no need to communicate with clients using numerous channels – all is at hand.
The set-up procedure is simple – all you need to do is contact us at [email protected] requesting the Facebook integration and providing us with the required details, and we’ll do the setup for you.
Let’s configure the Messaging
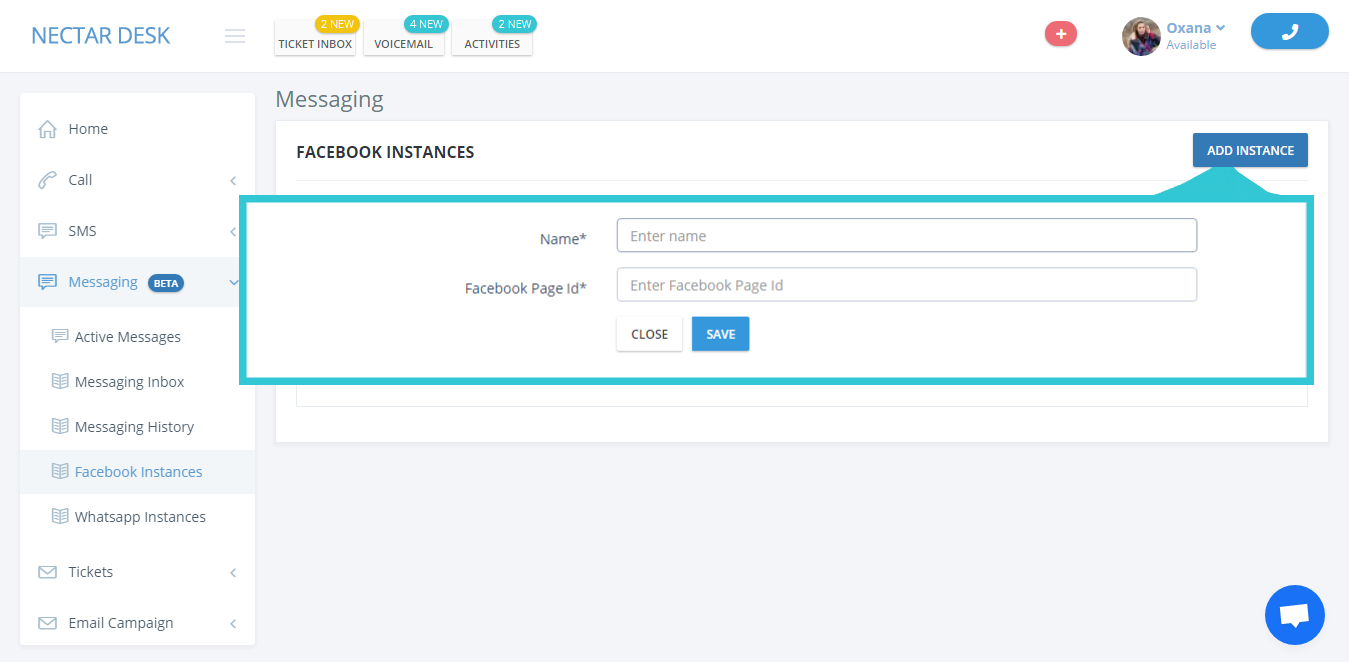
Once the accounts are integrated on our end, let’s create a Facebook instance to manage conversations. In order to do that, go to
Left-Side menu->>Messaging->>Facebook Instances->>Add Instance
*This option is accessible only for Master-Admin and Admins
**You can create as many instances as you’ve got Facebook business accounts
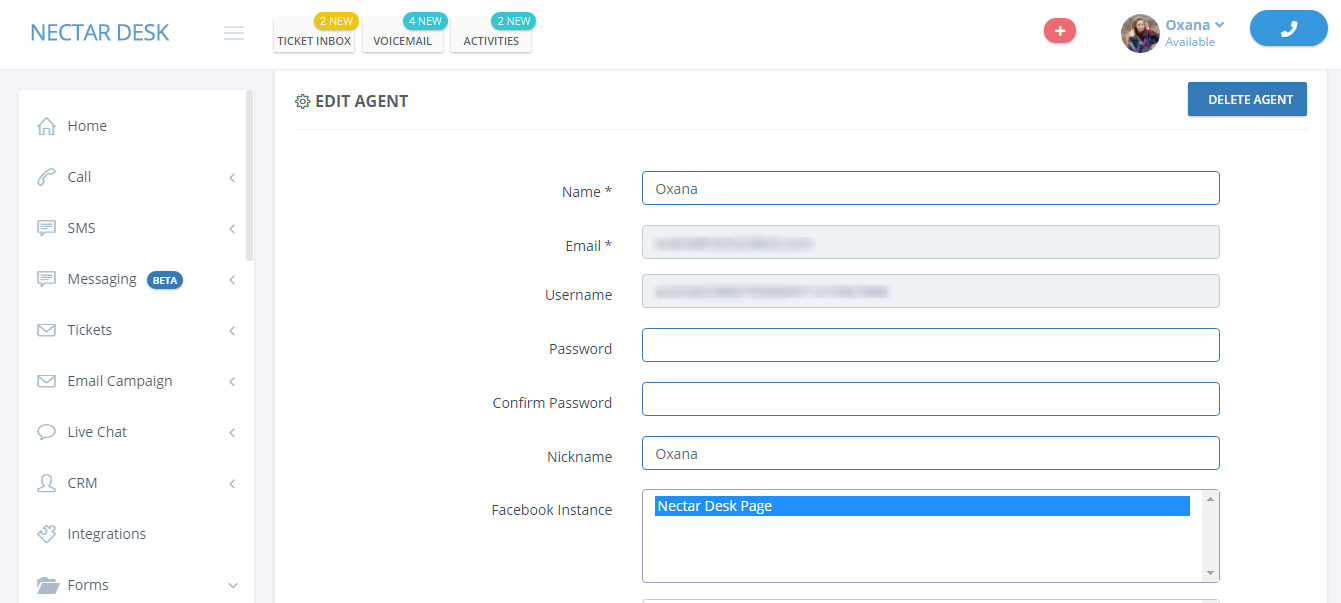
As soon as you’ve created the instance, assign the agents to it so they could handle the conversations in this channel. To do that, go to the
Left-Side menu->>Settings->>Agents->> Edit. Find Facebook instances there and choose the needed one. After that Submit changes.
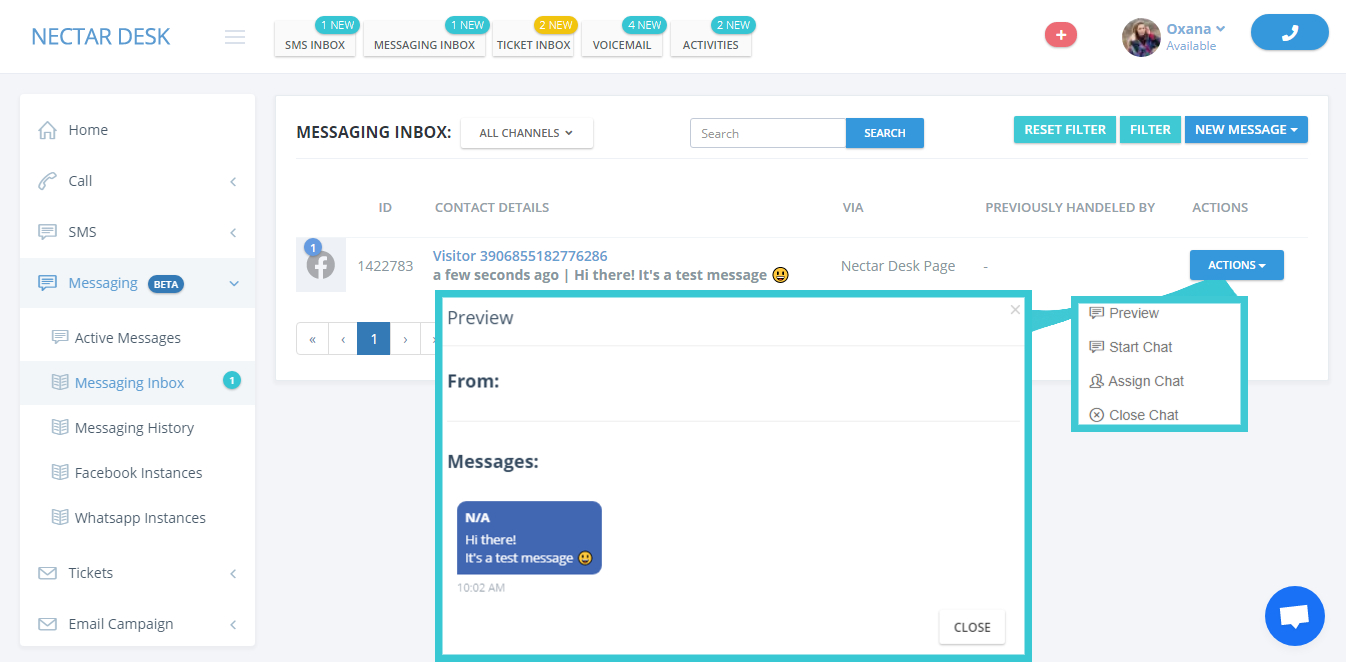
Now all new messages from Facebook will go to your Nectar Desk Messaging Inbox. Here you can preview the message, start, assign, and close the chat.
If you’d like to know more about this page – check this post.
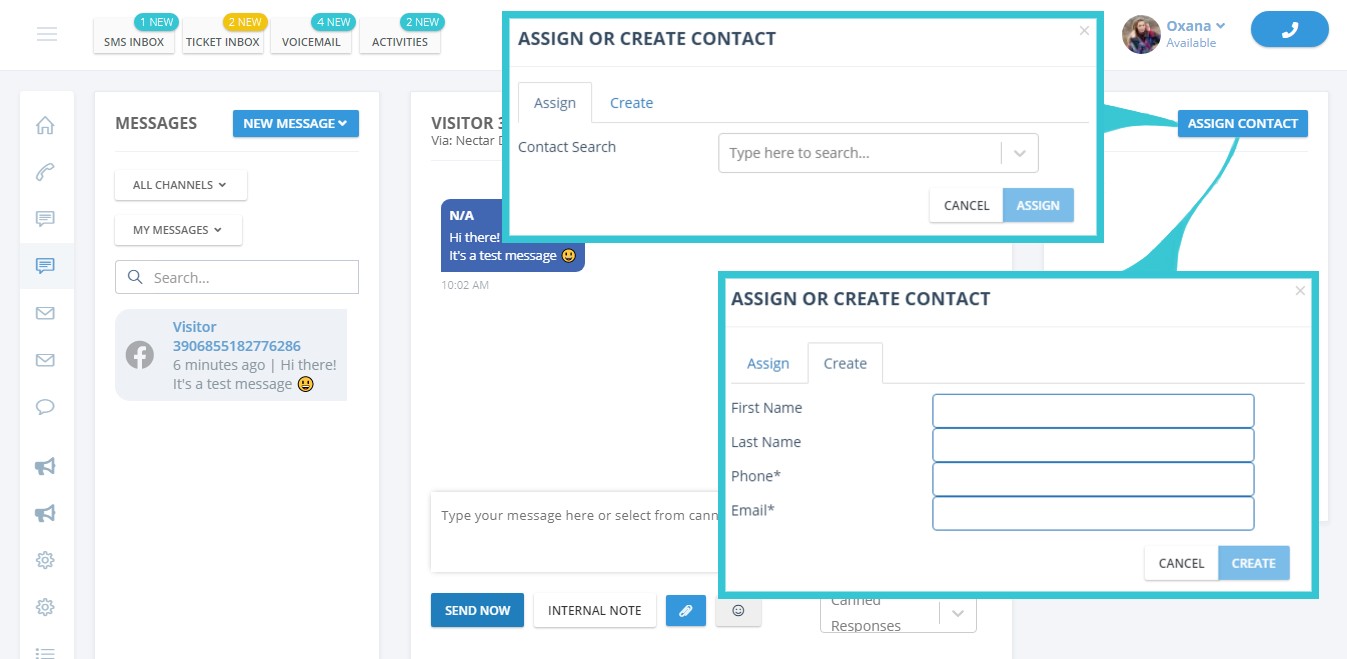
Once you press ‘Start Chat’, you’ll be redirected to the conversation thread in the Active Messages. If a contact writes to you for the first time, you will see him as ‘Visitor’ with a unique number.
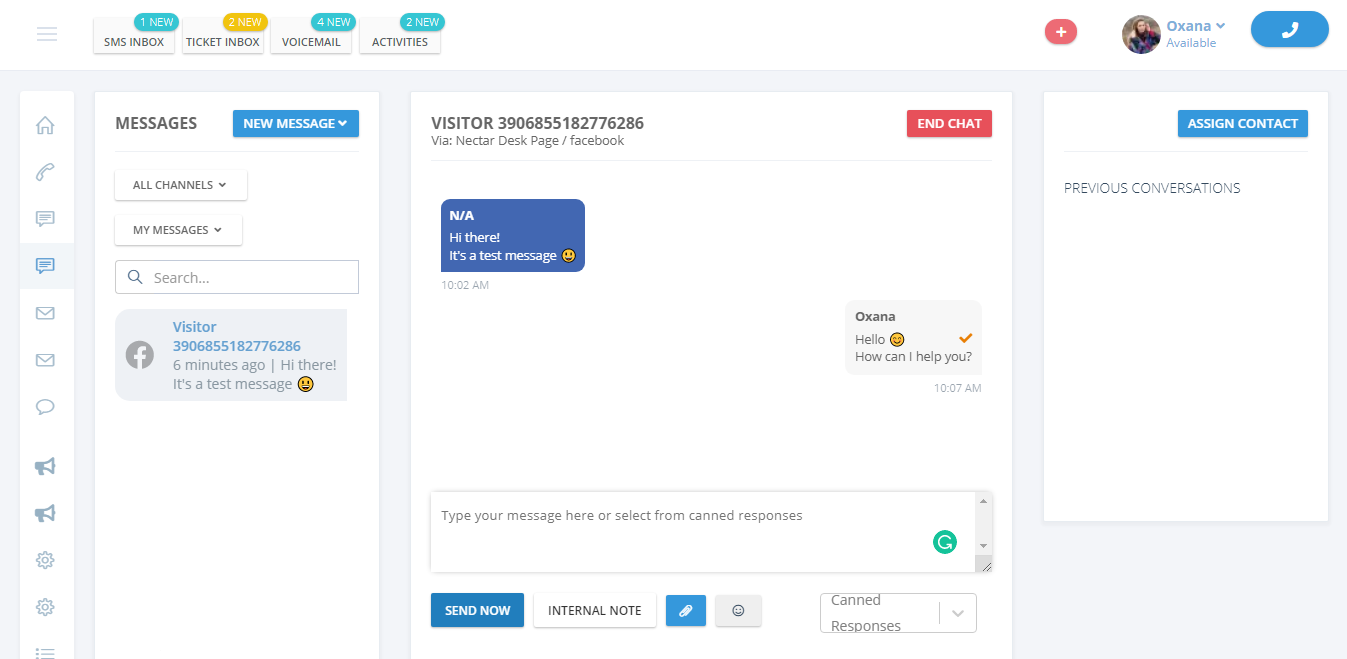
With the aid of the ‘Assign Contact’ button in the right top corner, you can assign a visitor to the already-existing contact in your CRM or create a new one. And the next time you’ll see the detailed conversation.
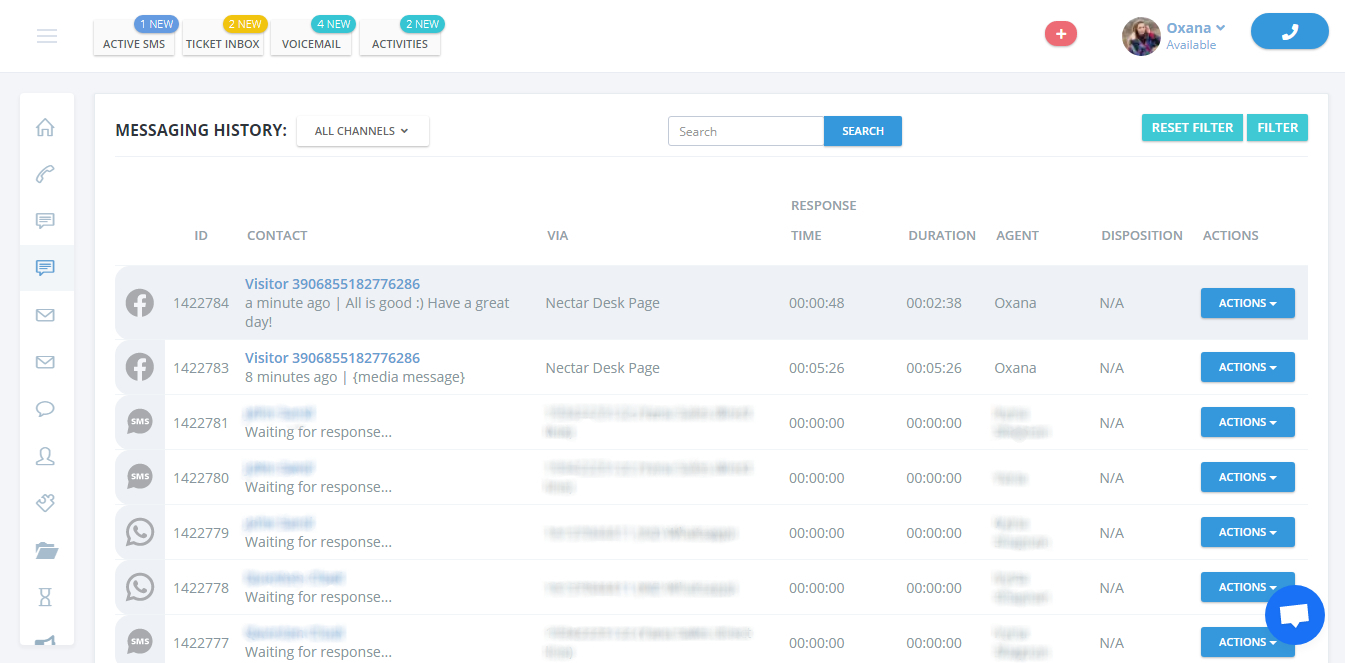
After closing a conversation, you can find it in the Messaging History.
Feel the benefits of the Nectar Desk integration with Facebook on your own.


