Omnichannel Solution
Seamlessly assist customers across voice, SMS, chat and email — respond to every message from one inbox. No more switching tabs.
Nectar Desk is AI-powered cloud call center software that handles inbound and outbound calls, SMS, live chat, WhatsApp, and email from a single browser interface. The built-in AI Voice Bot (VCA) resolves 40–65% of calls without a live agent, while seamless ACD routing and 50+ features keep your team running at full speed. Plans start at $50 per agent per month with a free 7-day trial.
Nectar Desk keeps every client conversation under one interface and gives you 50+ powerful features for $50 per agent / month.
✓ Free for 7 days. No credit card required.
Trusted by industry-leading teams


Nectar Desk's AI Voice Bot (Virtual Customer Assistant) uses ASR, NLU, and LLM technology to answer inbound calls, resolve customer requests autonomously, and warm-transfer to a live agent only when needed — passing the full conversation transcript and intent score. Opus Research benchmarks show 40–65% call containment; McKinsey documents 40–70% cost reduction at scale. Learn how AI voice bots work →
Estimate your monthly labor savings if Nectar Desk's AI Voice Bot contained 52% of your inbound calls — the Opus Research benchmark for well-configured AI voice deployments.
Model: 52% AI containment rate (Opus Research). Savings = contained calls × handle time × agent hourly cost. Actual results vary by call mix, knowledge-base coverage, and CRM depth. Estimated payback on a typical $500 setup: < 2 weeks.
Set up in minutes. Customizable for your specific workflow.
Nectar Desk is one of the most affordable and complete SaaS solutions for handling inbound and outbound calls with full reporting and analytics. Buy a number, customize your agents, and go live in minutes.
Our cloud call center platform is designed to revolutionize how businesses handle client interactions across every channel.
Real improvements from teams using Nectar Desk across industries.
Reduction in Average Handle Time (AHT)
Increase in First Call Resolution (FCR) Rate
Decrease in Call Abandonment Rate
Cost Reduction with AI Voice Automation — McKinsey
Inbound Call Containment Rate with AI Voice Bot — Opus Research
Based on aggregate performance data reported by Nectar Desk customers. See verified reviews on G2.
Nectar Desk provides customized solutions for different industries. See how our tools can grow your business without major investment.

Seamless customer journey. Efficient workspace for agents.
Seamlessly assist customers across voice, SMS, chat and email — respond to every message from one inbox. No more switching tabs.
Nectar Desk's Virtual Customer Assistant (VCA) resolves 40–65% of inbound calls without a live agent — using ASR, NLU, and LLM to talk like a human and scale without hiring.
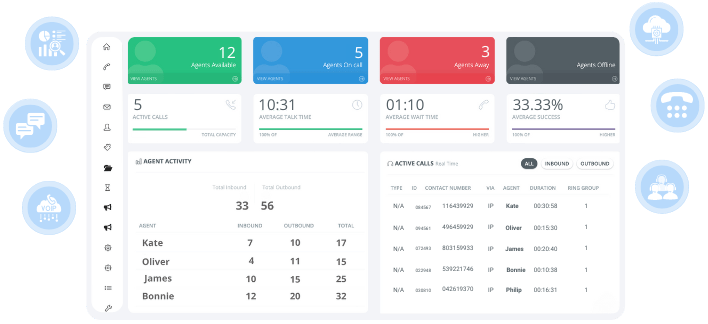
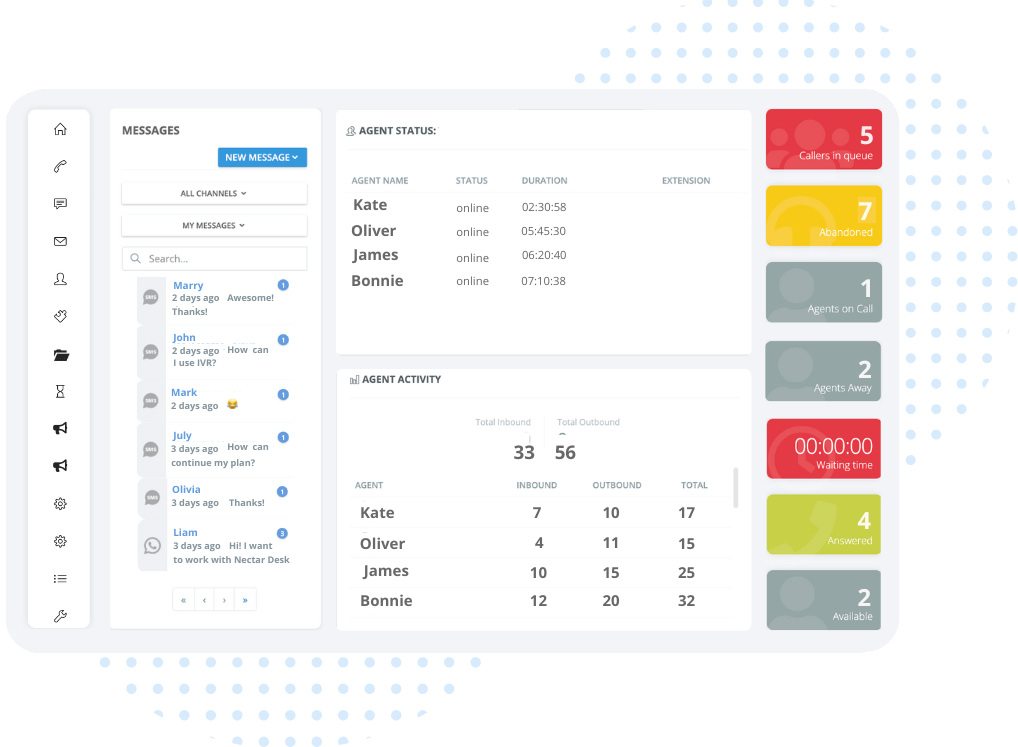
Evaluate KPIs with real-time dashboards, workforce management tools and the ability to cultivate productive customer relationships.
Agents can effortlessly manage, track and report on every customer engagement.
Nectar Desk lets you control every omnichannel interaction on the fly. Integrate SMS, ticketing, chat, email and voice in one workspace.
Use cloud-based ACD tools, auto-dialers and IVR to reach prospects worldwide. Localize your caller ID to reduce dropped calls.
Nectar Desk's Virtual Customer Assistant (VCA) resolves 40–65% of inbound calls autonomously — using ASR, NLU, and LLM. Seamless warm transfer to the right ACD queue when human judgment is needed.
CRM, ERP, marketing automation and your other favorite tools — Nectar Desk's API supercharges every workflow.
Each member of our team deeply values every client we serve.
"We use this software to take calls, make calls, email our leads, and for tracking purposes. I love that their reps are always available via chat to assist when something comes up. Very user-friendly."
"Overall, support is always responsive on the rare occasion we have issues. The product is intuitive and continuously enhanced with new features. We're happy we chose Nectar Desk!"
"The predictive dialer alone saves our agents two-plus hours a day. We've been on Nectar Desk for over two years — setup was simple, the feature set keeps growing, and support is top-notch."


Cloud contact center software is a SaaS platform that lets you handle inbound and outbound customer interactions across voice, chat, SMS and email from any browser — with no on-premise hardware required.
QA keeps agent performance consistent, improves customer satisfaction, and reduces churn by surfacing coaching opportunities through call scoring, recordings and real-time monitoring.
It unifies tickets, voice, chat and email into one workspace so help-desk agents resolve faster with full customer context, canned responses and automated routing.
Core features include ACD call routing, IVR, omnichannel inbox, auto-dialer, CRM integrations, call recording, real-time and historical analytics, quality scoring and workforce management.
Customers reach you on their preferred channel while agents see one continuous conversation history — shortening resolution time and increasing first-contact resolution.
Yes — Nectar Desk integrates with HubSpot, Pipedrive, Salesforce, Zoho, Insightly, Salesflare, ServiceTitan, Shopify, Vonigo, GoHighLevel and more via native integrations and a public REST API.
Nectar Desk starts at $50 per agent per month with 50+ features included. A free 7-day trial is available with no credit card required.
Yes. Nectar Desk's Virtual Customer Assistant (VCA) is a production-ready AI voice bot that uses ASR, NLU, and LLM to handle inbound and outbound calls autonomously. The VCA resolves 40–65% of calls without a live agent (Opus Research benchmark) and performs seamless warm transfers with full context when escalation is needed.
Opus Research benchmarks show 40–65% call containment for well-configured AI voice deployments — meaning nearly two-thirds of inbound calls resolve without a live agent. Actual rates depend on call type, knowledge base coverage, and CRM integration depth.
Nectar Desk's AI-powered call center software starts at $50 per agent per month, including the AI Voice Bot (VCA), omnichannel inbox, ACD, IVR, auto-dialers, CRM integrations, and 50+ features. A free 7-day trial is available with no credit card required.


