Calling Campaigns can be created by your Administrator. They are used to initiate a call based on a contact list. The calls can be automatic or manual. If the calls are automatically dialed, once you start a campaign Nectar Desk will start dialing the numbers.
The Calling Campaign Progress Page contains detailed information about how successful your campaign is. You can review your results in a few clicks at any time.
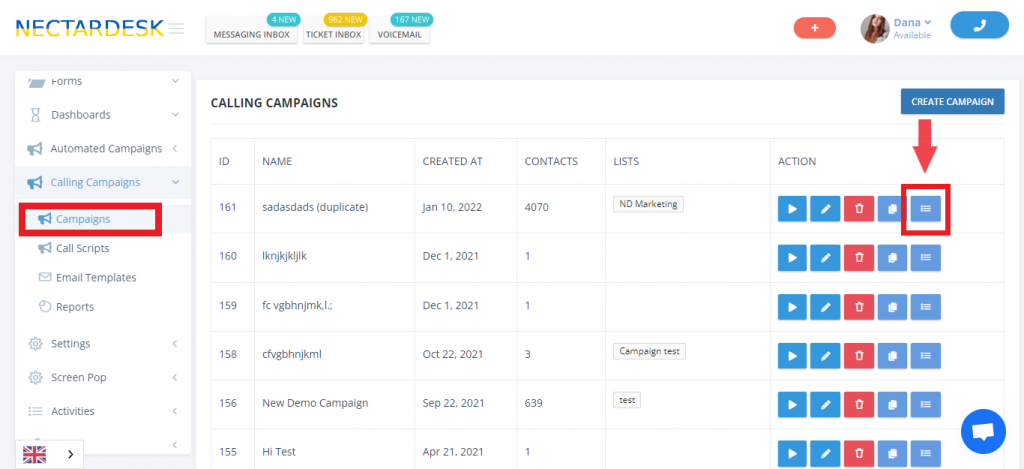
Where can I find it?
- Go to the Calling Campaigns section in the left-side menu.
- Then you will be able to find the Progress Page button in the Action section.
What can I see?
Once you clicked, you see data about Total Contacts and Eligible Contacts To Dial.
The Progress Page contains information about:
- Contact Name;
- Contact Phone;
- Date Added(the date when contact was added to the list assigned to the dialer campaign);
- Dial Attempts(total call attempts through this specific dialer campaign;
- Last Call(last Call ID (hyperlink to open call history in new page) related to the contact made through this campaign);
- Agent(agent the contact is assigned to in the campaign);
- Last Disposition(last disposition of a call related to the contact);
- Last Skip Reason(show last skip reason if contact was skipped and there were no dial attempts after using this campaign);
- Blocked Dispositions(Call ID with a disposition that was marked as “Blocked” for the current dialer campaign).
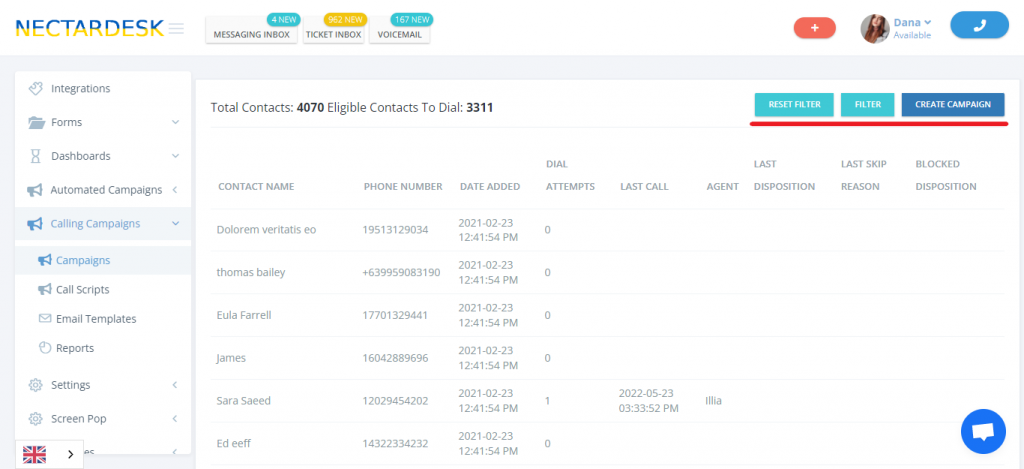
Moreover, there are three buttons to Filter your contacts and Reset them as well as to Create Campaign.
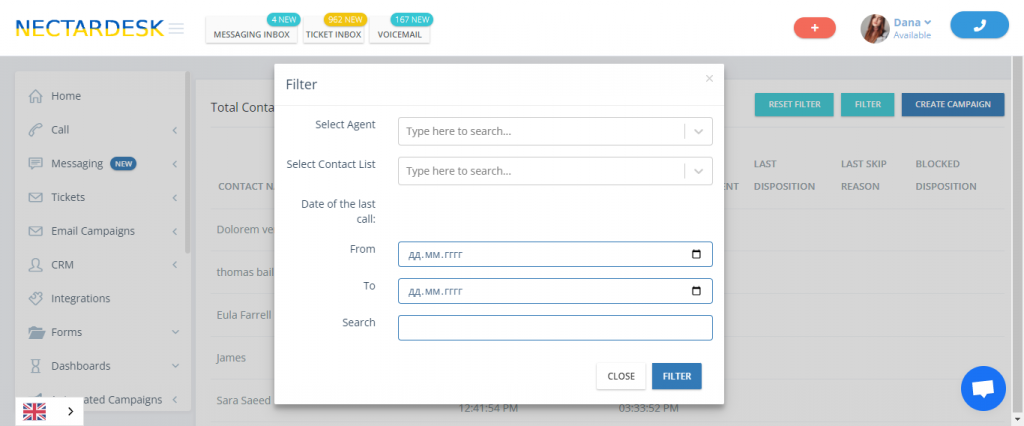
It is possible to filter your contacts:
- by agent (to filter the contacts that were dialed by the selected agent)
- by list (to filter the contacts that are from the selected list)
- by the date of the last call
- by the number of dials
- by blocked dispositions

